
I was put into contact with someone who was restoring a 1991 BMW850 about an awesome project! He had a gear (pictured below) that was part of the assembly that electronically moves the seat back and forth.
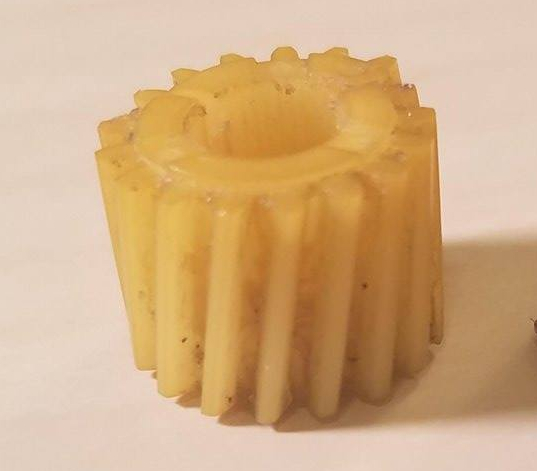
Unfortunately, the gear cracked in half from age and stress, and he was unable to find a replacement gear. (The reason why the gear looks whole in the picture is I glued it together for the purposes of taking the picture). So, he had me reproduce the gear and 3d print replacements!
The process was a long one for sure, but full of interesting experiences! My first concern was getting the profile of the gear correct, then I would worry about how to slant the teeth later. To reproduce the profile of the gear, I took this picture:
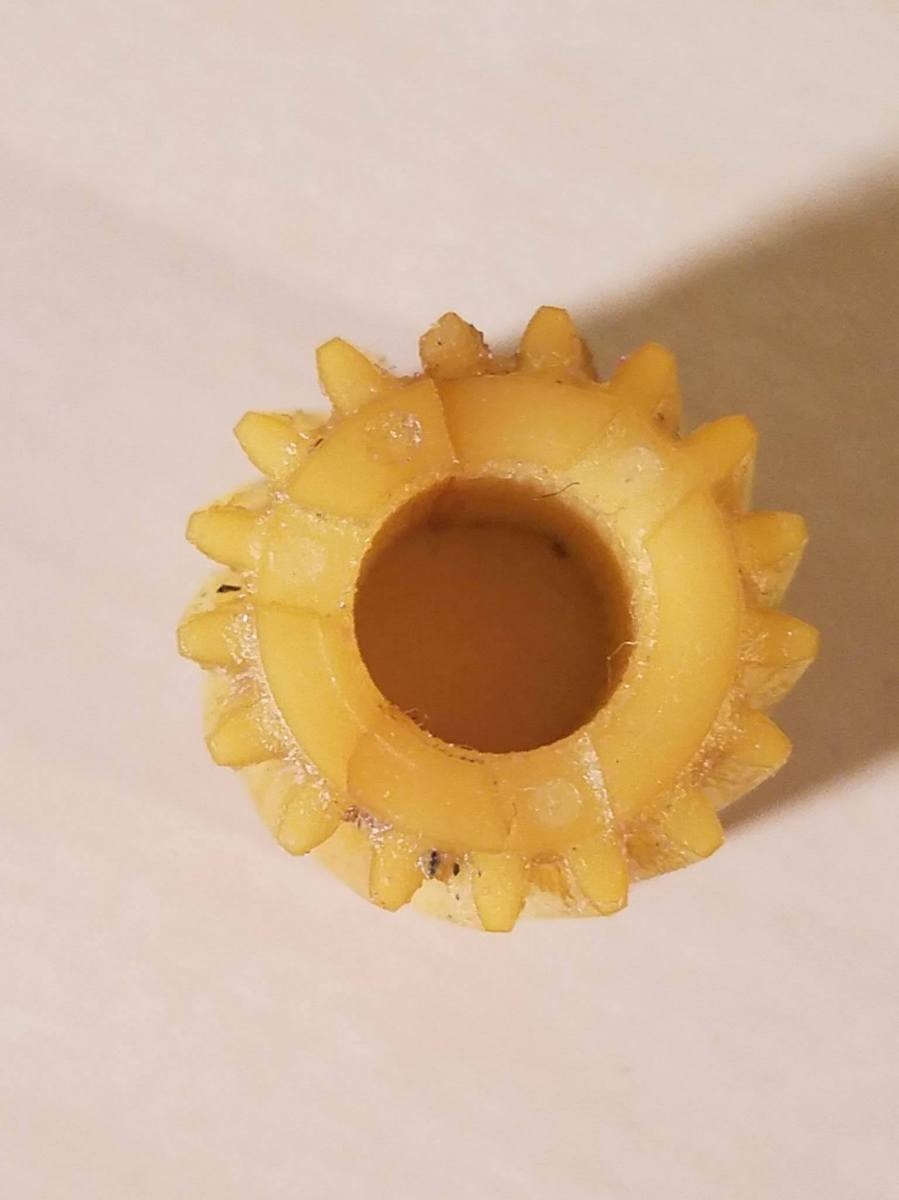
and I imported it into Inkscape (basically, an incredibly advanced version of Microsoft paint). looking at the above picture, you can definitely see that some of the teeth are more worn than others.
My concern was that, since I was 3d modeling a new gear from an old gear, I didn’t want to reproduce the wear that the old gear. To fix that, I traced the profile of the most intact tooth (in the red box below):
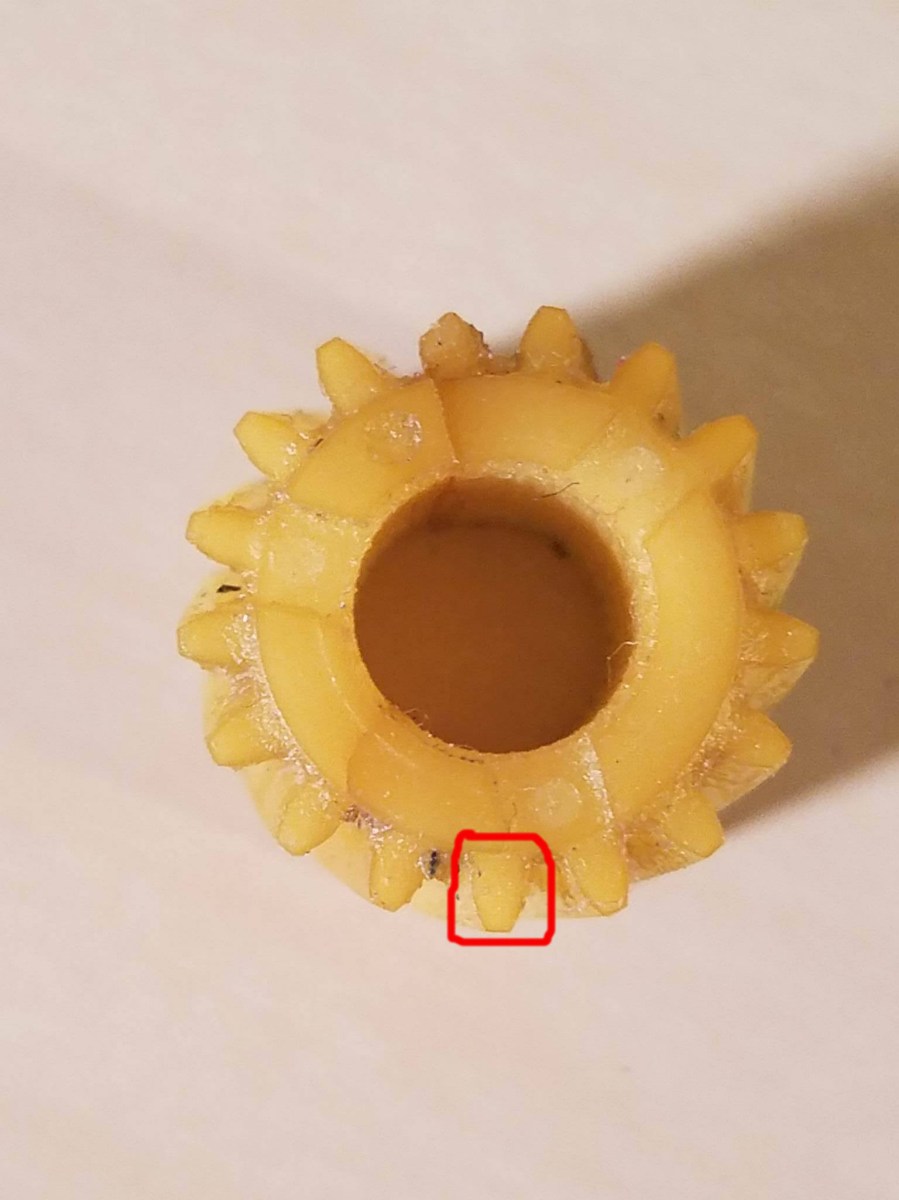
and I copied the profile, rotated it appropriately, and placed it over top of all the other teeth as precisely as possible. When I was finished I had a precise, 2d picture of the gear!
Now, I had to take that 2d drawing and make it 3d. To do that, I exported it as a .svg, which you can import into your favorite 3d modeling software! I then took the SVG sketch, and extruded up to give the gear some thickness. This created a very flat (around .1″) plate that gave me a 3d profile of the gear. Now, I could have continued extruding up the entire height of the gear, but that wouldn’t allow me to twist the teeth correctly!
Now, I came to the next dilemma: how to get the exact curvature of the teeth onto the new gear. It was time for more pictures! I took a picture of the side profile of the gear, and then drew two lines like this:
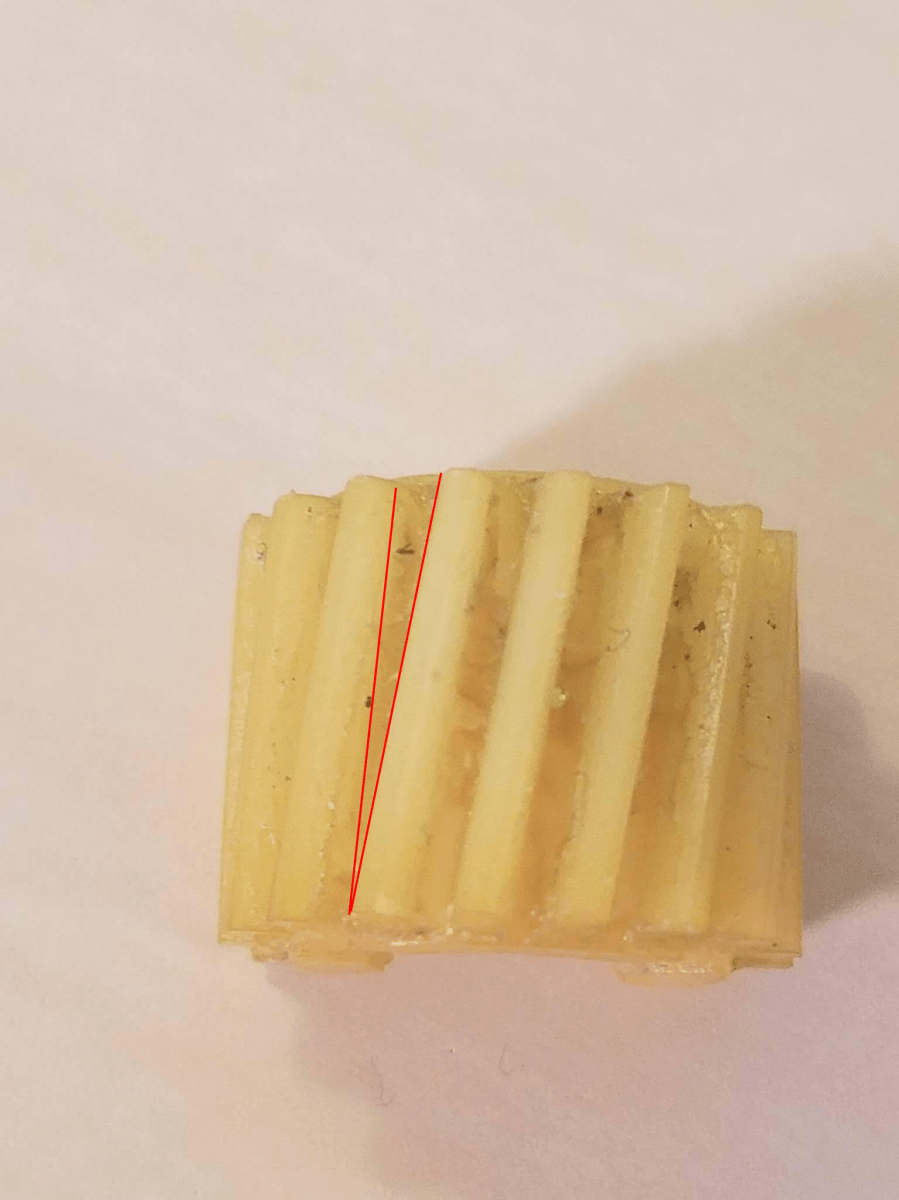
This gave me something that I could very easily measure with a protractor to get the angle of the gear!
Now, to get that angle in cad, I took that .1 inch plate I had made, copied it, and put the copy above it in 3d space! Then, I took the top copy, rotated it by the angle I measured with my protractor (it was around 8 degrees if I remember correctly), and then did what’s called a loft (it connects two points that are on top of each other in 3d space and draws a path between the two points, creating a new object! To see how loft works in 3d modeling, see this youtube video: https://www.youtube.com/watch?v=iJLXlg2Cn6Q).
Of course, I also had to precisely scale the gear so it was the same dimensions as the old gear. To do that, I measured the old gear with a set of incredibly accurate calipers and did some algebra to determine the factor by which I had to scale my version of the gear.
Ok, so, after all that long winded explanation, I present to you the final product!!!!!
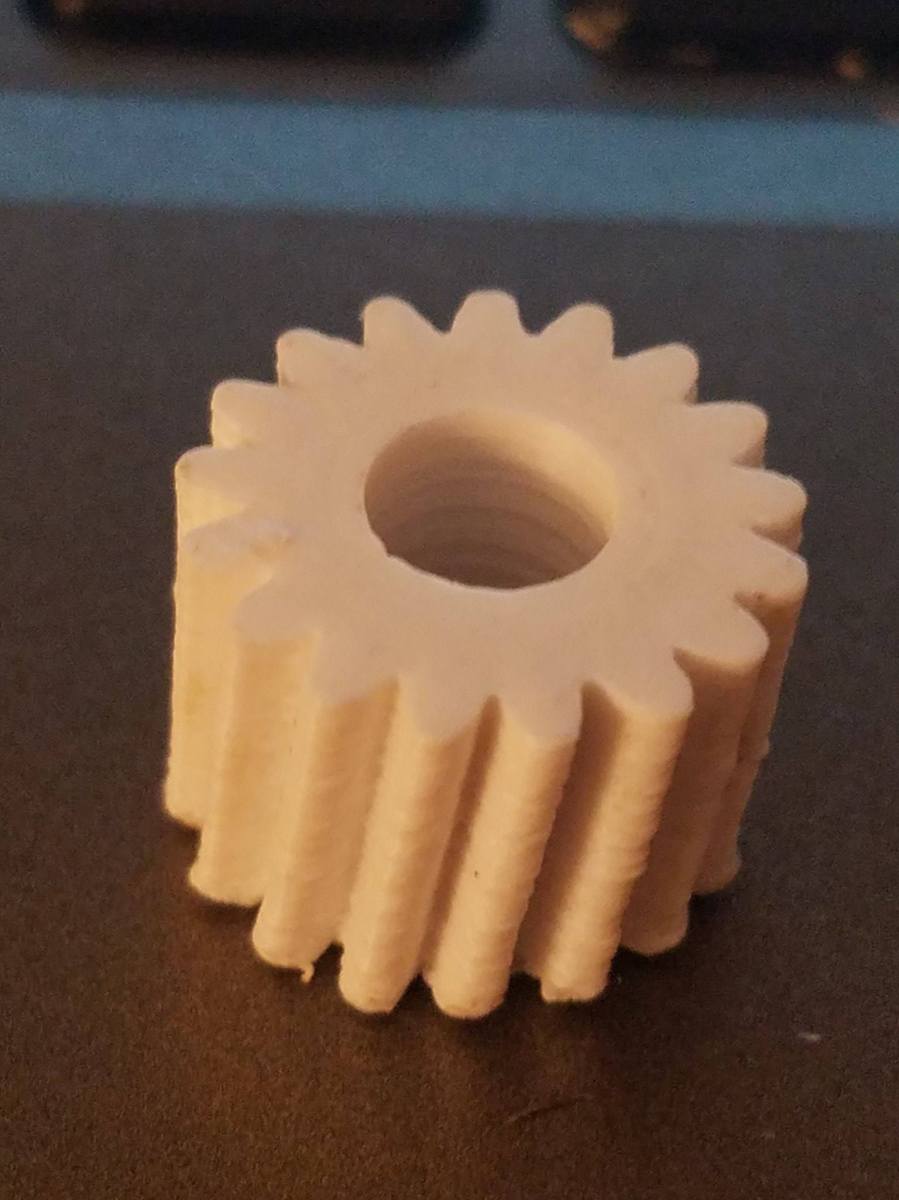
This was printed at a resolution of 100 micron on my Hyrel Engine 3d printer. I’ll explain a few things about the gear, since there might be a few questions for the reader at this point:
1.) Why are the teeth not incredibly smooth like the old gear? Well, the old gear was injection molded, which is a process that gives it a crisper surface finish. However, upon initial tests, the weird surface finish does not affect the functionality of the gear! It meshes perfectly with all the other parts of the assembly just as well as the old one did!
2.) When installed on the assembly, it goes on a shaft. How close is the diameter of the hole to the diameter of the shaft? I intentionally left the hole a little bit small, so that you can precisely drill the hole to pressure fit on the shaft.
3.) How long would this gear last in practical applications? At this point, I have not been able to test longevity since it hasn’t been installed in the car yet, but I’d expect it to last a fair bit of time. The gear is 100% solid ABS plastic (the same plastic they make legos out of), so it should be about as strong as the original gear.
The coolest thing about this experience for me is that I now have the most accurate reproduction of this gear that has been made next to the manufacturer’s version (which isn’t being produced anymore)! It was also interesting to see something I reproduced working in the original assembly as well as it does.
So, there you have it! Next post will be an update on the 3d printed barstool project, so stay tuned!
John (aka The Mad Printer)

One thought on “1991 BMW 850 project!”