There are Many Like it But…

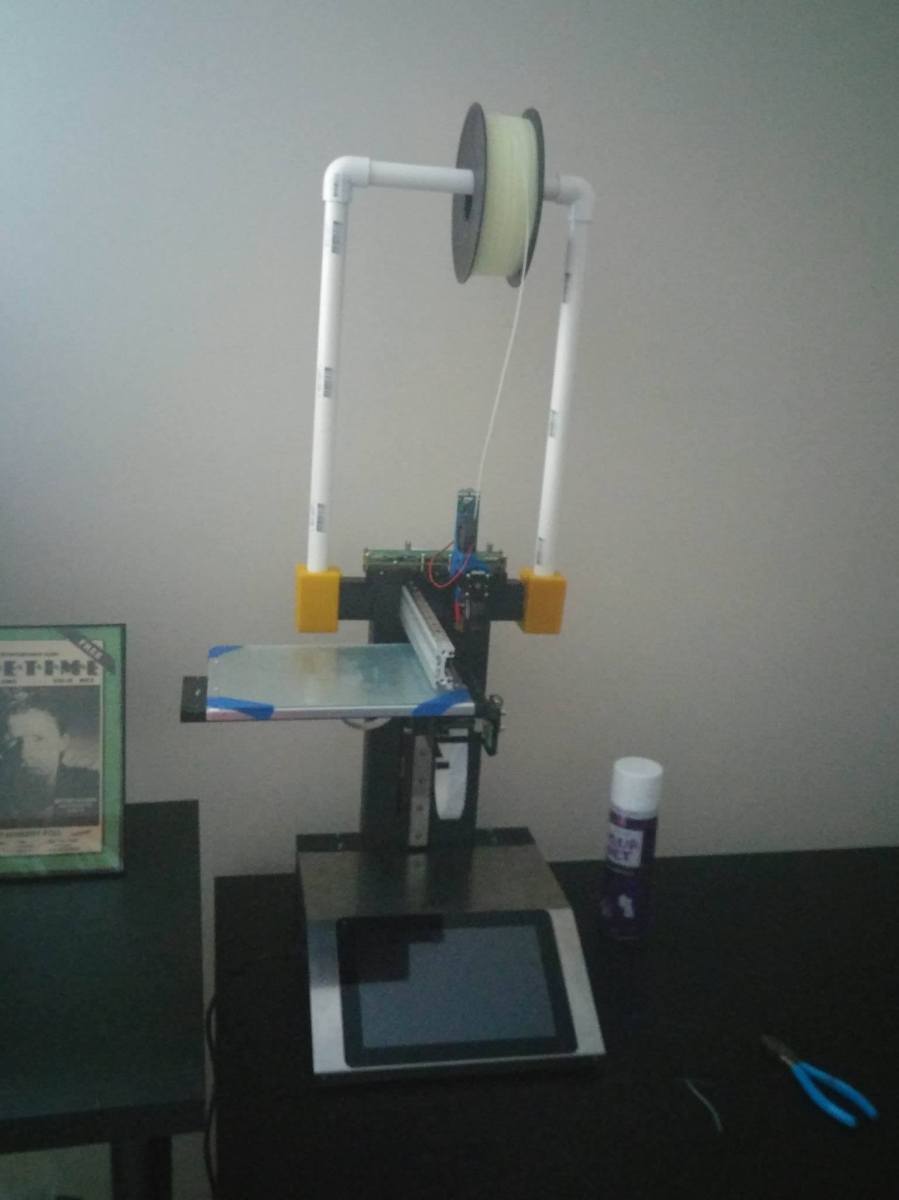
This one is mine, and I’m so excited!  I finally got my hands on the Hyrel Engine I will be completing all of my projects on from now on:

myHyrel(newestPic)

For the future of the blog, I’m going to focus on the experience of printing with Hyrel printers!  Some of the projects will be focused on dialing in new materials and getting them to print on the Hyrel (since it can print any material with a little TLC and adjusting of settings!!).  Other projects will be focused on completing cool projects that show the printer off!

You can see the first project in the above picture!  The Hyrel has 2 side clips that were meant to hold extra heads, but I cadded a block that holds a 3/4″ diameter PVC pipe assembly and that clips into the side clips on the hyrel.  It looks a little lopsided because of the angle of the picture, actually.  When you take the picture straight on, it looks a lot better haha.  My main reason for adding the PVC pipe assembly is to hang filament above the head!  There are some filaments that are very brittle (wood filled PLA, Brass filled PLA, machinable wax filament, etc), and print much better when gravity assists their feeding into the head.  suspending filament dramatically changes printing in my experience because it facilitates easier flow when the printer doesn’t have to pull the filament in as hard.

When you dial in new filaments, there are a whole bunch of settings that you have to keep in mind in order to get perfect filament flow through the nozzle!  Pulses per nanoliter, feed rate, prime and unprime settings (steps, speed of steps, time), fan settings, flow rate, head temperature, and bed temperature).

The “pulses per nanoliter” setting adjusts the number of pulses of the extruder stepper motor per nanoliter of plastic extruded through the nozzle.  The “feed rate” setting adjusts the amount of nanoliters fed through the nozzle.  For the prime/unprime settings, the “steps” setting adjusts the number of steps from the stepper motor for the unprime (retract) or the prime (extrude after retract), the “speed of steps” setting adjusts the speed at which the prime/unprime steps from the stepper motor happen, and the “time” setting adjusts the amount of time the head movement pauses while the prime/unprime event is happening (in milliseconds).

Of course, different materials have different base temperatures and cooling requirements.  For example, ninjaflex needs about 40-50% fan depending on the size of the part, while PLA only needs about 30% fan.  different materials also extrude at different temps (240-ish for ninjaflex, 212-ish for PLA), and different materials require different bed temps to be able to print well without any layer separation.

The last factor is flow rate, which is controlled through slic3r, the software on Hyrel’s printers that makes an STL printable.  This also controls the amount of flow through the nozzle in addition to the flow rate.

So all the different settings combine to make the magic formula that allows plastic to become 3d printed things!  My next post will be about using all those settings to dial in a material so you guys can see the process that I go through!  I’ll keep you posted.

John (aka the Mad Printer)

Entire Pen Stand Complete!!

Well, I finally finished the staining!  And, you know what?  I realized I don’t even need any urethane since the stain has such a glossy coat to it!

penFinal
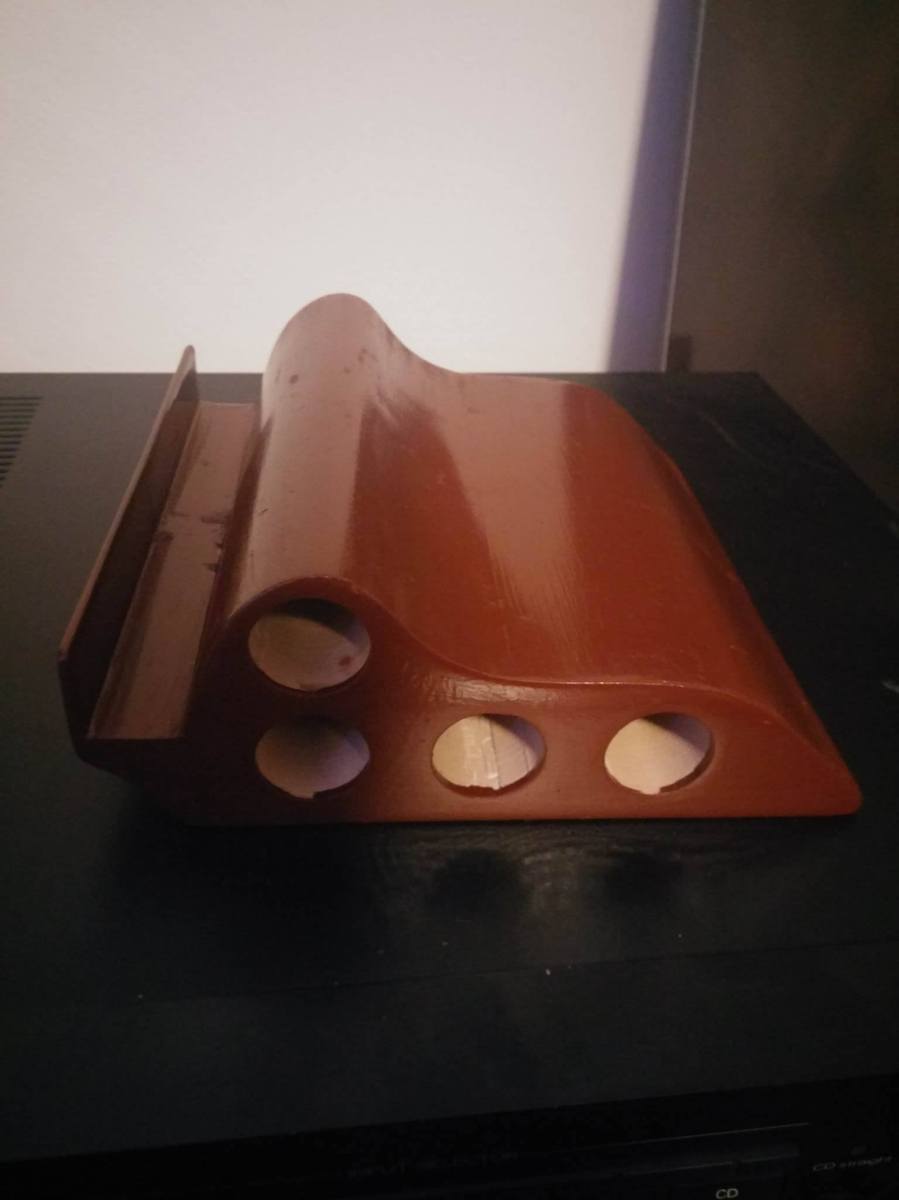
It was definitely an interesting experience for sure!  The nice thing about the stain is it hides all those glue seams completely!  It worked super well.

On another note, my Hyrel Engine is now set up!  Working on a big blog post, so more to come in the next few days, but it’s bed time for me now ;).

John (aka The Mad Printer)

First Coat of Stain done!

So the initial staining after the sanding turned out really well!  I still have to add another coat or two to this side and then stain the rest of it that you can’t see in the picture, but it’s definitely coming along nicely!  After the stain, my plan is to urethane it to get a really nice gloss.  Interestingly enough, the stain made some of my glue seams a lot less apparent, so that ended up working well.  Sorry that this is a shorter post, but this is a shorter update :P.  More to come!!  Follow!  Subscribe!  Stay tuned!

stained pen stand

John (aka the Mad Printer)

The Sanding is Finally Done!!

Yep, that’s right!  I’ve finally sanded all the way up to 1000 grit!  I compiled a neat little album of closeup pictures of all the sandings all the way from 60 grit to 400 grit.  It’s really neat how smooth the surface gets.

60Grit
60 Grit
80Grit
80 Grit
150Grit
150 Grit
220Grit
220 Grit
320Grit
320 Grit
400Grit
400 Grit

The interesting thing is that, after about 400 grit, I could feel a difference, but I couldn’t capture the difference in pictures.  So that’s why I stopped the pictures at 400 grit!  The final pen stand looks amazing though.  While there are some surface problems still, I am hoping that the stain will help make it look a little better.  My plan is to stain and urethane it.  Maybe the surface problems will create an interesting distressed look… who knows!  That’s the next step, and I will hopefully get that done soon, so keep checking back to see the final result!

Pen Stand

John (aka the Mad Printer)

Pen Stand: The Sanding Continues

That title sounds like quite the horrible movie title!  However, yes, it’s true, I finally got some sandpaper!  Now, the next few posts will be about finishing the sanding on the pen stand.  I will be starting with 60-grit sandpaper and working my way all the way up to 1000-grit for an incredibly smooth surface!  You guys have already seen some of the work I did with the 60-grit, but what some of you didn’t see was this amazing closeup of what 60-grit sandpaper makes the surface look like:

60Grit.jpg

Of course, the more I sand, the finer this surface will become!  For example, here’s a picture of what the pen stand looks like after being sanded with 80-grit sandpaper:

80Grit.jpg

The difference was striking to me!  I’m going to keep sanding, so updates coming soon!  Here’s an overall shot of what the pen stand looks like sanded now:stand.jpg

John (aka the Mad Printer)

A Brief Break

Hey everyone!  So, until I can get to a sander and more sand paper, I’ll put the pen stand project on hold and talk about something different for a little bit.  First up on the list of tangents is Fusion360!

Autodesk Fusion360 is this awesome CAD software that I learned this past year.  Previously, I was using Autodesk 123D design (much to the chagrin of all my solidworks-using friends haha).  It was a great beginning cad program and gave me a great base for knowing how to create things in CAD!  However, it severely lacked in some of the more advanced features that I wanted.

One particular project I wanted to make was a pencil cup, but have it be made so that it looked like the entire cup had been twisted (as if you heated the cup up and turned the top and the bottom halves different ways to create a spiral effect).  I had this vision in my head, but didn’t know how to cad it.  Until, of course, I learned Fusion360!

Fusion is great because you can start with a standard form (a cylinder, a box, a sphere, etc) and push and pull certain sections of it to give it the look you wanted!  So that’s what I did!  I started with a cylindrical form, added 8 faces to it, twisted the entire shape, so that the faces were also twisted, and extruded every other face outwards by a small amount.  Also, since it was a cylindrical form, it didn’t have a base or enough thickness, so I had to merge a cylindrical portion into it, and I had to thicken the walls to 3d printable dimensions (3mm) That whole procedure came out with this:

pen cup

This pen cup was exactly what I wanted and had the flowing shape that I wanted!  The other nice thing about this shape is that it should print without support!  So, I 3d printed it out, and it worked really well.

I never could have done something this complicated in 123D design, so it’s worth noting that different CAD softwares have their perks.

I love doing cool stuff like this, so you’ll definitely see more of it up here every now and again.

John (aka The Mad Printer)

First Sanding Done!

So, here’s what the fountain pen stand looks like after being completely sanded with 60 grit sandpaper!

penStandSanded
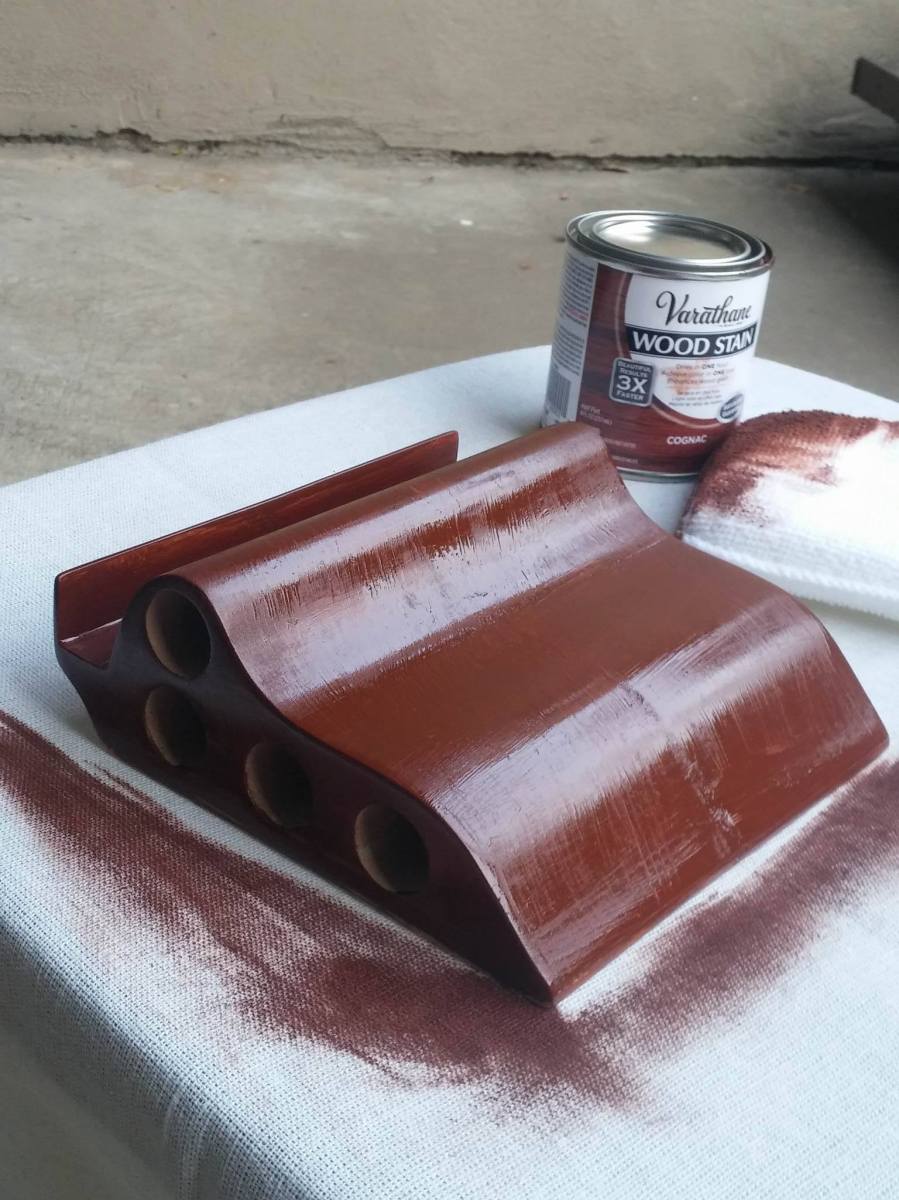
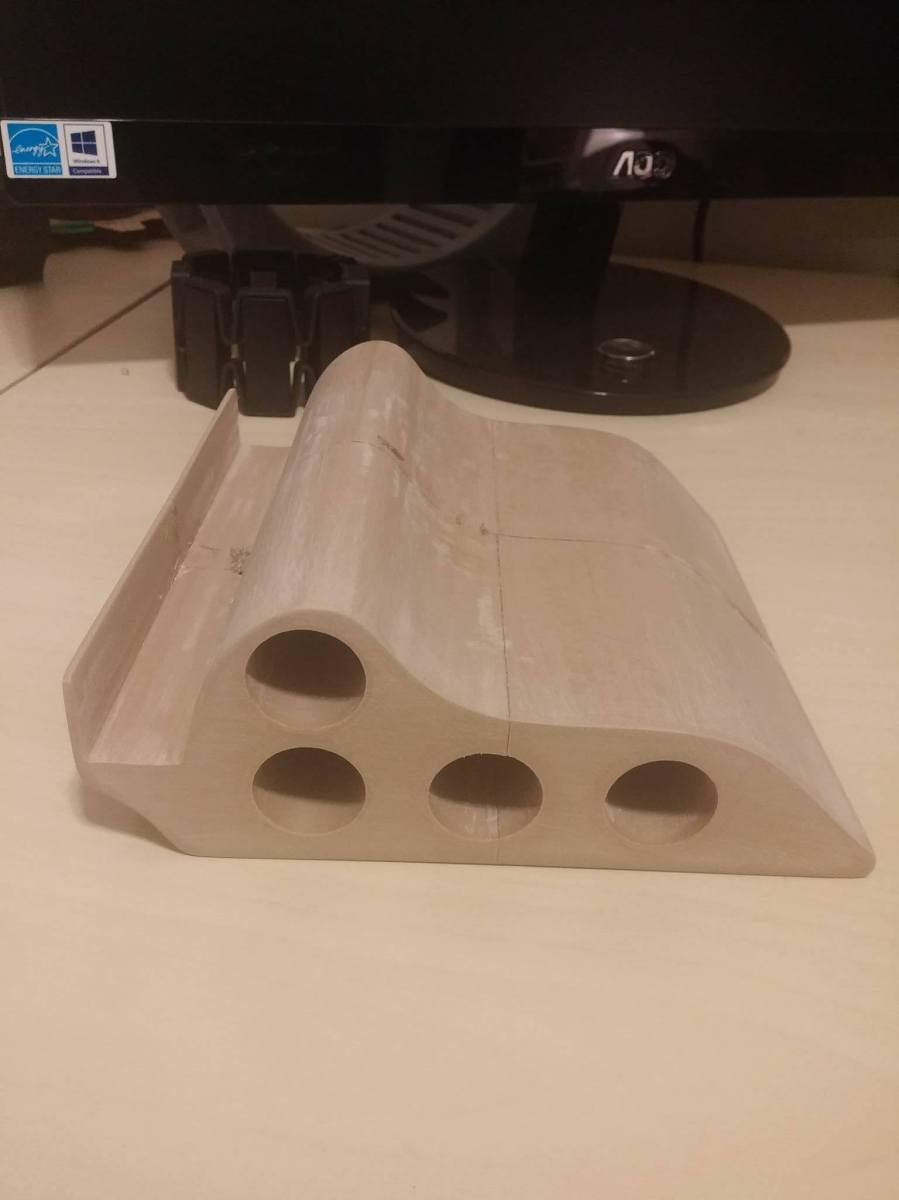
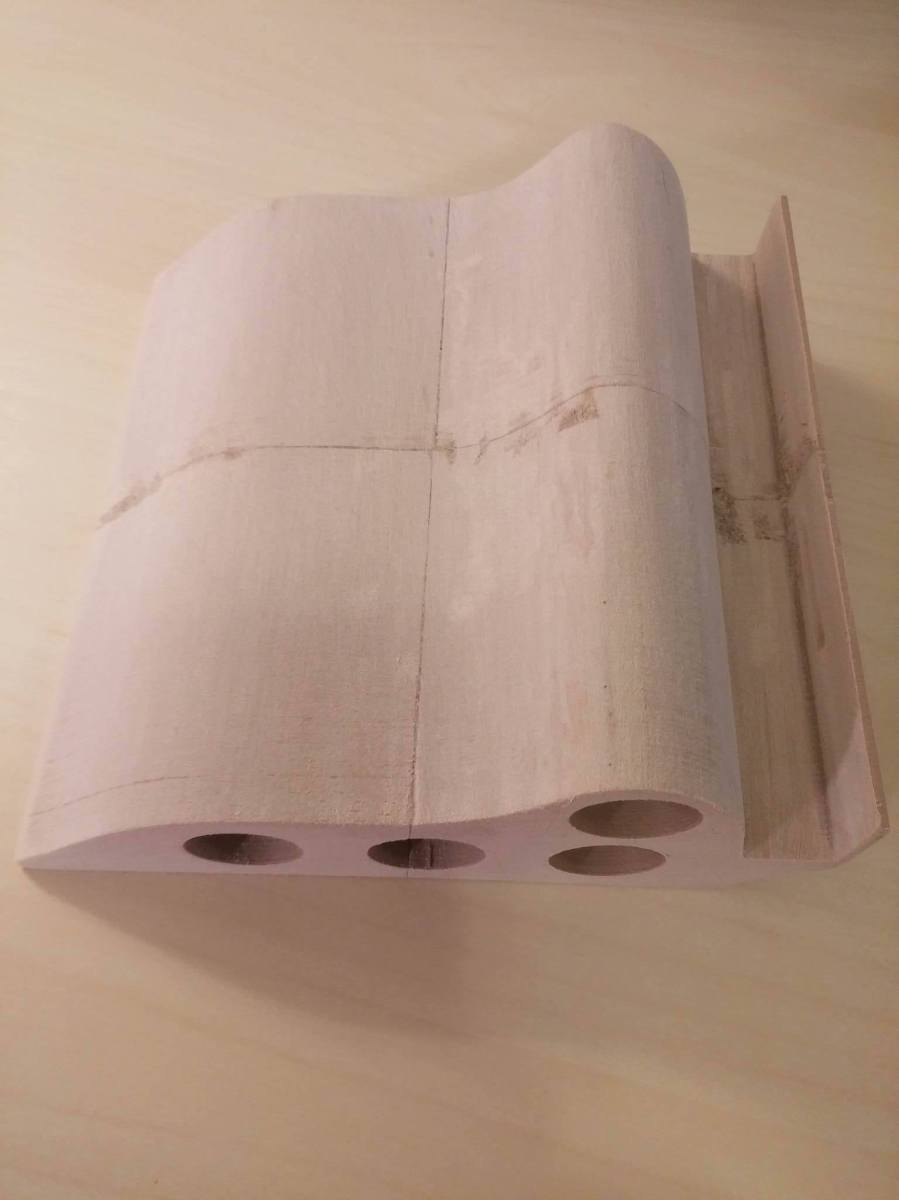
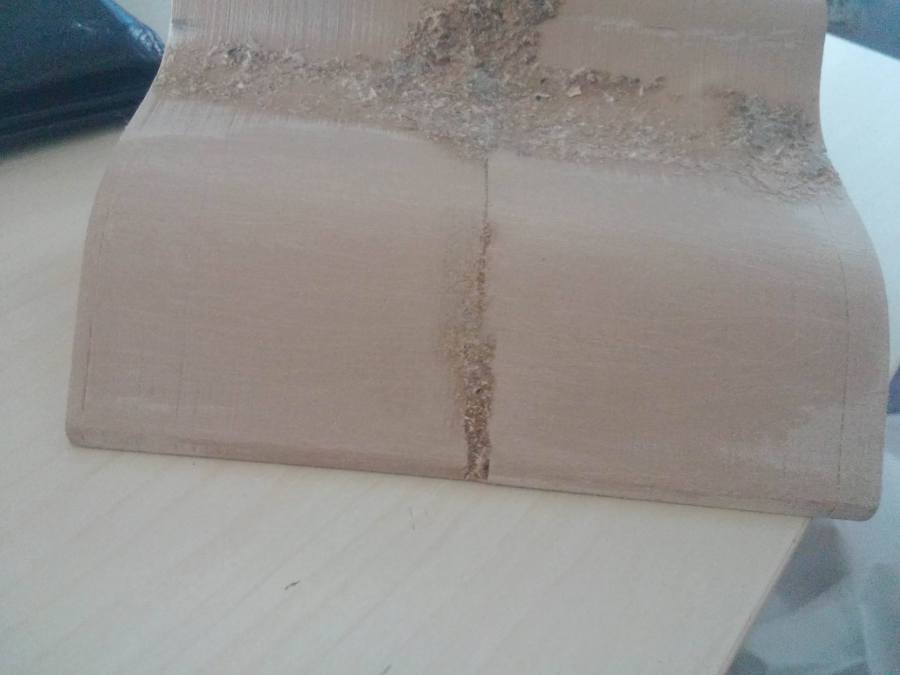
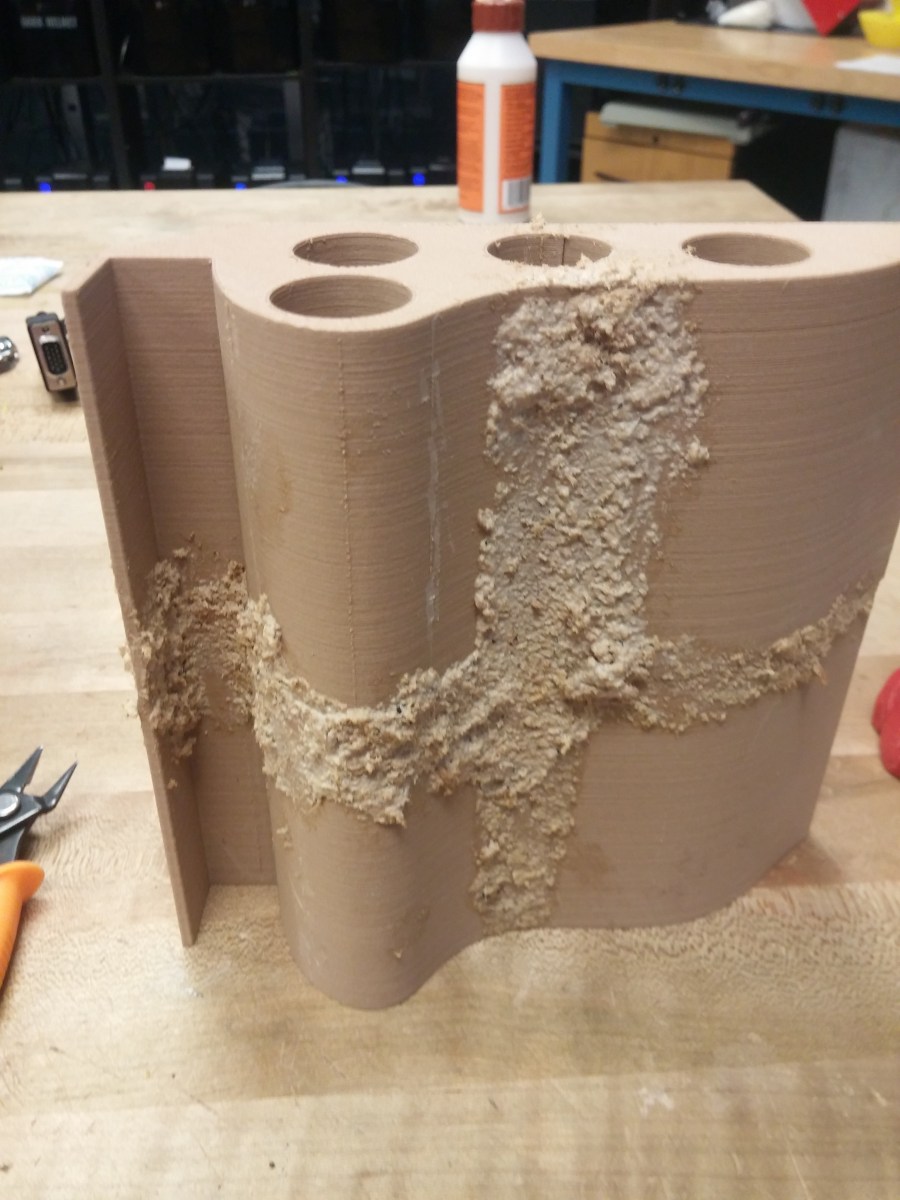
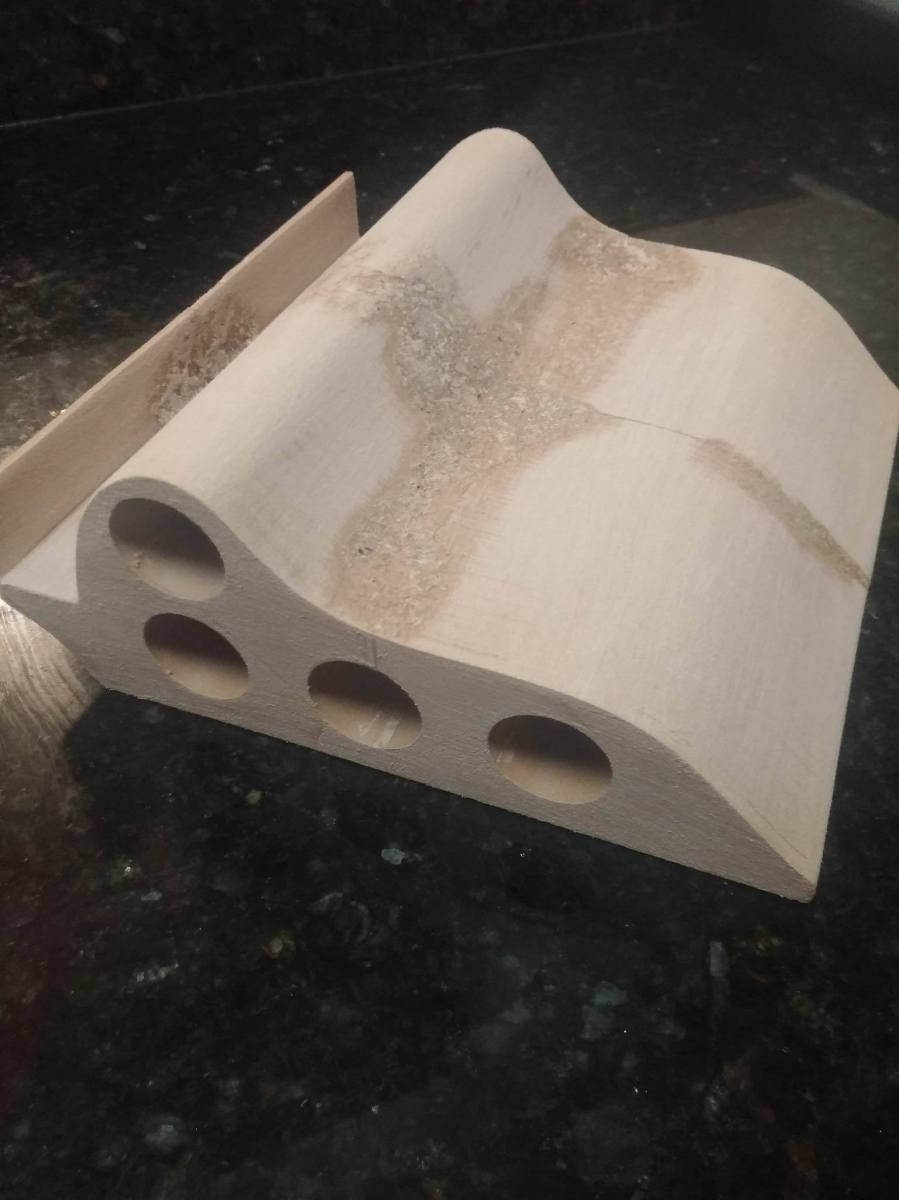
Upon seeing this picture, you notice a few things:

1.) The wood-infused PLA has a much lighter color when sanded.
2.) The mixture of glue and sawdust seemed to have an adverse effect on the coloring of the piece overall.  Interestingly, my homemade wood filler has been sanded flush with the surface of the print, and it is very smooth when I run my hand over it.  The reason why it’s discolored is because, since the glue dried clear, it is preventing the plastic underneath from being sanded, thus altering the color because of point #1.

I’m going to see if I can use a power sander to buff the glue away and get back to the plastic underneath, so updated pics will continue to come!

John (aka The Mad Printer)

Almost, but not quite….

So, I started sanding the pen stand from the last post!  I decided to start with 60 grit sandpaper and work my way up from there (since the layer of homemade wood filler I put on it was rather thick).  The wood filler did it’s job for sure, but only for the bigger areas:

penStand

Now, to explain what you’re looking at a bit, I sanded the bottom portion of the stand, but left the top portion unsanded for reference.  As you can see, after sanding, the wood filler stayed behind in the larger cracks I had.  But it didn’t do anything to seal up the smaller cracks left from gluing all the small pieces of the pen stand together.  Also, grabbing random sawdust to mix into filler probably wasn’t the smartest idea since the filler doesn’t really match the 3d-printed wood at all.

Live and learn I guess!  This is all valuable information for the next time I (or anyone else who doesn’t know too much about woodworking like myself) wants to try this.  I think, at this point, I’m going to continue sanding the surface, get it as smooth as possible, and then worry about how to make the cracks invisible.

More progress pics coming soon!

John (aka The Mad Printer)

3d Print Finishing Demo

Since I just finished a big long post about 3d print finishing, I thought I would do a project that demonstrated the printing and finishing process from start to finish! I have a fancy pen display stand that I had cadded some months ago, and it’s bigger than the build volume of my printer.  So, I had to go into a software called Netfab.  Netfab is a fantastic piece of software that helps you both repair holes in the mesh of an STL file and take a big stl file and chop it into smaller pieces.  So, that’s what I did with my pen stand (printed in wood-infused PLA): 20160608_225340

I chopped it into 4 separate pieces, printed them out, and then glued them together!  The resulting product looked like this: 20160608_230216.jpg

Now is where the finishing part comes in!  There are a few problems with the way the print came out post assembly:

  1. There are some artifacts left over from the 3d printing (the surface isn’t completely smooth).
  2. you can see all the lines from where I split the part and rejoined it together.
  3. The wood isn’t a really nice color.

So, there are three things I’m going to do to fix these issues:

  1. Sand the 3d print until it is incredibly smooth and uniform
  2. Fill all the lines from where I split the part
  3. Stain the wood a nice color

First up: fill all the lines!  Since this piece is made from wood-infused PLA, I decided to use wood filler to fill the lines (so that all parts of the piece would stain well).  However, I didn’t have wood filler handy, so what do you do when you don’t have wood filler?  You mix sawdust with Elmer’s glue and make some!  This is the first time I have tried this technique, so I have no idea if it will turn out well, but we’ll see.

Right now, it looks fairly ugly:

20160609_202046.jpg

However, that’s because I really glopped it on thick.  Most of this will get sanded away, hopefully leaving all those seams filled with the elmer’s/sawdust mixture.

More pictures to come once everything is nicely sanded and prepped for staining!  Yay cliff-hanger posts!

John (aka The Mad Printer)