Finishing 3d Prints

An essential part of the skillset for any 3d print enthusiast is knowing how to take a 3d print and make it not look like a 3d print!  The finishing process depends a lot on what material you decide to use, but the basic idea is to either sand or chemically process the material until you cannot see the 3d printed layers.  IMHO, Your aim is to get as close to commercial-grade plastic as possible.  However, some people like to preserve the 3d printed look and just shine it up a little bit.  It all really depends on what you’re looking to get out of your surface finish and how much time you are willing to put in.

I will say, the easiest thing to do to any material to finish it is to paint it just the way you would a Paint-Your-Own-Pottery piece.  However, here are some of the other things you can do:

To finish 3d printed plastic, you can do one of 3 things (or a combination of the 3)

  1. Acetone smoothing (applies to ABS only)
  2. XTC3D
  3. sanding

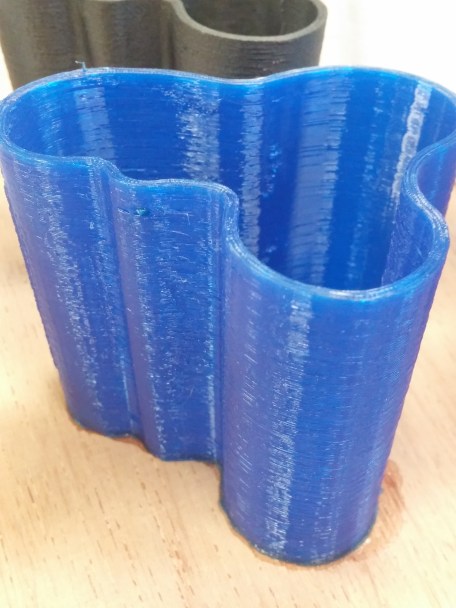
Acetone smoothing is probably the faster of the 3 ways (If you are working with ABS!  Acetone doesn’t react with other materials).  If you dip a paint brush in acetone and paint it onto the surface of the part, the outer layer begins to melt a little, causing the surface of the part to shine.  The result becomes more dramatic when you use an acetone vapor bath (I can’t go into how to create an acetone vapor bath, since I don’t have too much experience with that.  There are plenty of Instructables and articles out there though!).  See below (3d printed part without any finishing on left, and acetone vapor finished in the middle and on the right):

Interestingly enough, if you are 3d printing PLA, you can get the same shining/melting effect with acrylic glue.  However, acrylic glue only works if you are using straight PLA.  I haven’t had any success getting it to work on some of the infused PLAs (Coffee-infused, steel-infused, carbon-fiber-infused, wood-infused, etc).

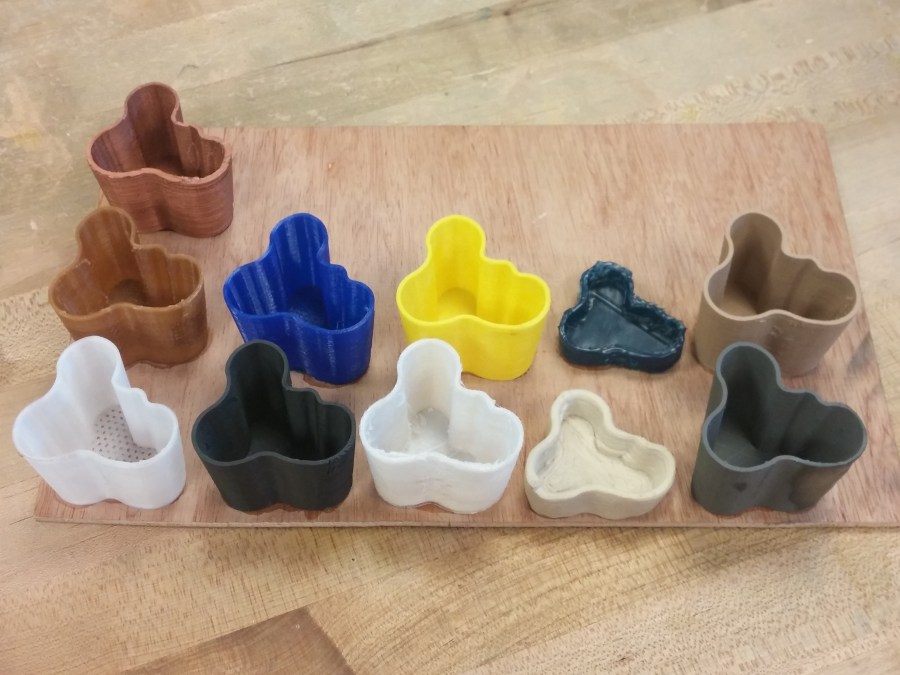
XTC3D has a similar effect, except it’s an additive process and it will work on any plastic-based material.  it puts a uniform coating of epoxy on top of the part, filling all the layer gaps.  XTC3D has the added benefit over acetone of strengthening the part a little bit!  Here’s what a part in the middle of having XTC applied looks like:

However, XTC is not as fast as acetone (it takes overnight to cure, while acetone-treated parts cure very quickly).

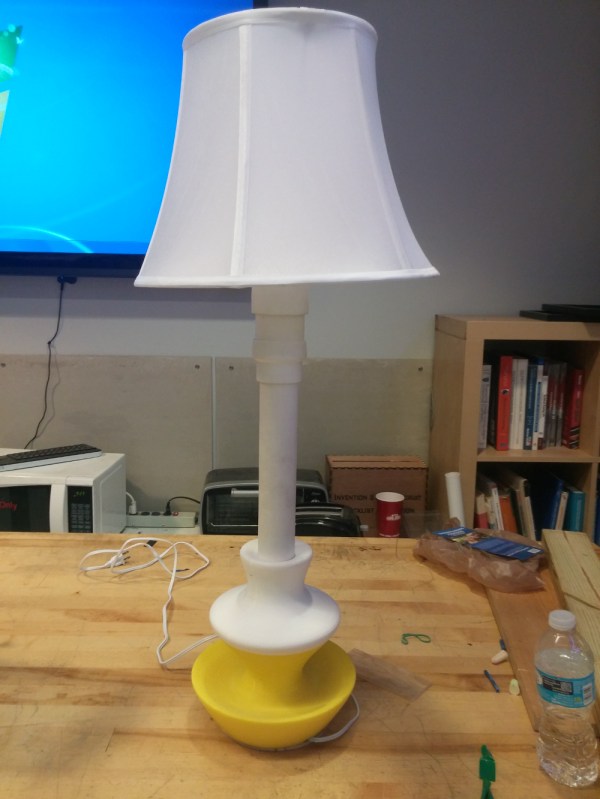
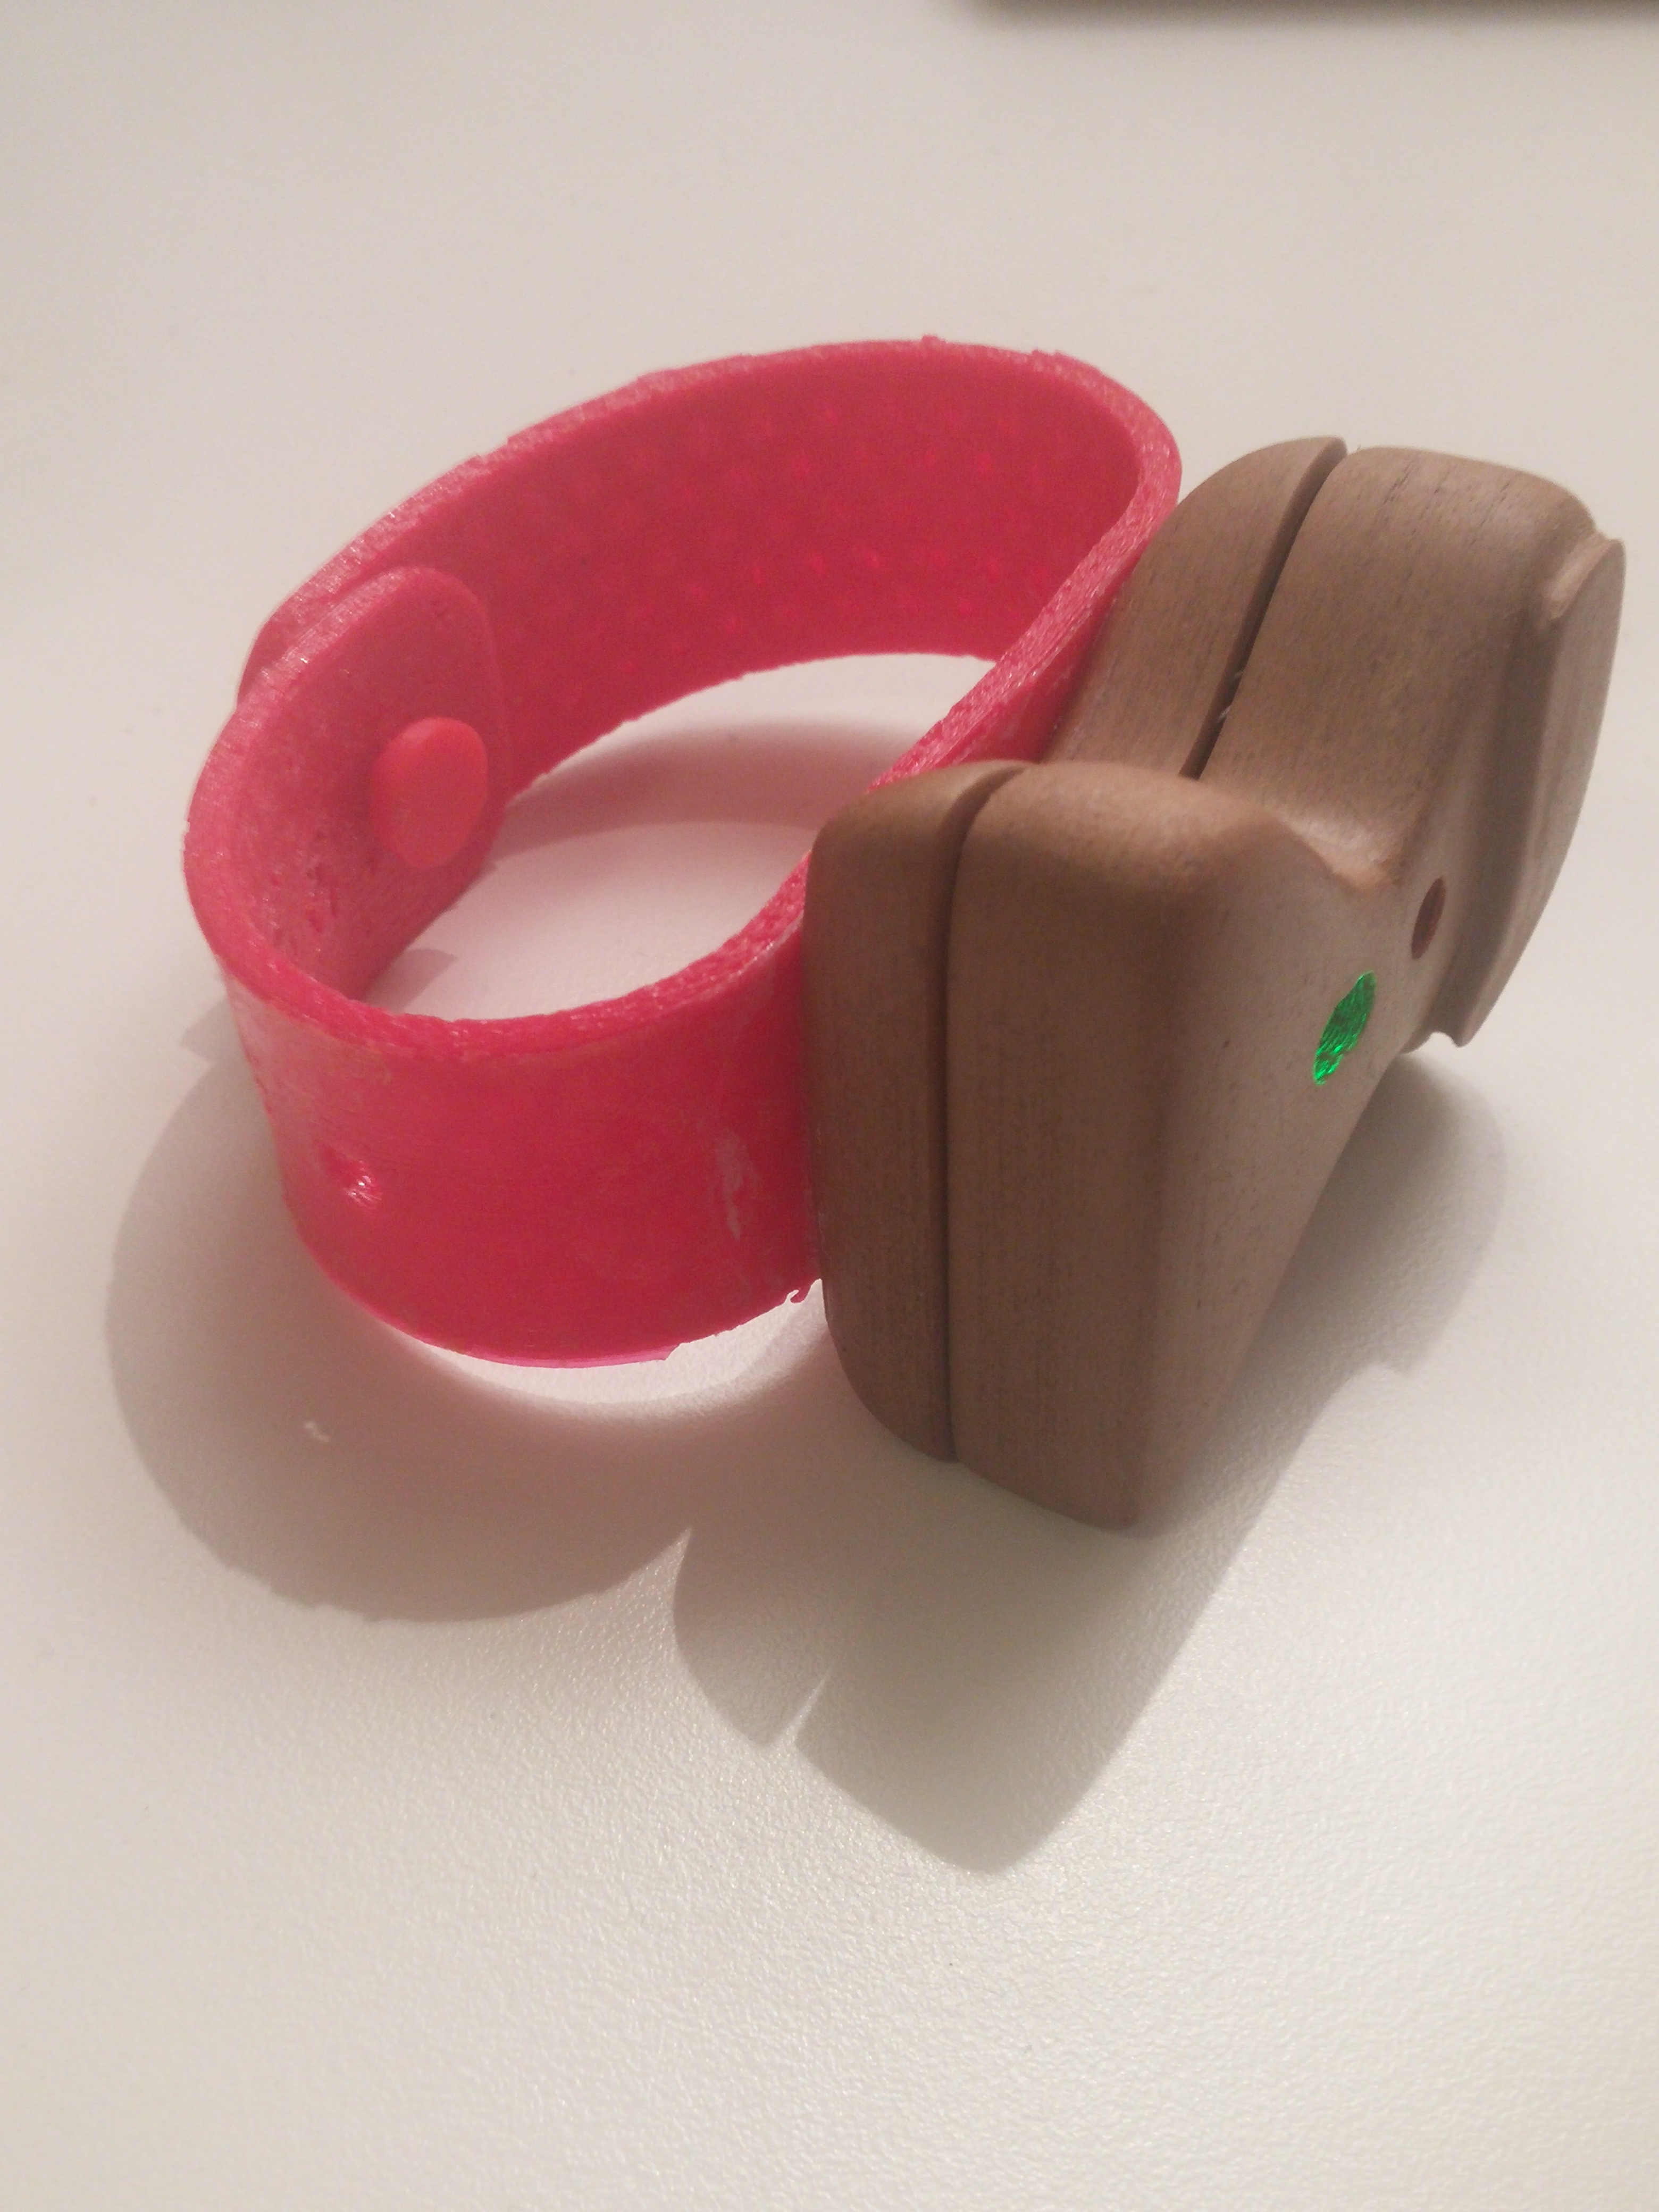
The third method, sanding, is usually best done in combination with XTC or acetone.  If you apply coats of XTC or acetone and sand in between, you can get an incredibly smooth surface that is close to injection-molded plastic!  To sand a 3d-printed part, I start with 80 grit sandpaper, go over the whole part with it, and then progressively step up the grit and do the same thing repeatedly (going from 80 grit to around 400 grit).  You can use up to 1800 grit if you are really particular about the surface finish, but in the higher grits, it becomes harder to see that your sanding is doing anything.  Here’s an example of a 3d printed part that was finished with sanding and staining!  The part on top of the ninjaflex band was printed in wood-infused PLA.  I sanded the PLA starting with 80 grit sandpaper and going all the way up to 1800, and it was incredibly smooth!  I then stained the wood-infused PLA with oak stain to give it a relaly nice finish.

pendant.jpg

If you put in enough effort, you can get incredible parts that no one can even tell were made on a 3d printer, so Happy printing!


John (aka The Mad Printer)

Edit: There is one method I forgot about for finishing 3d prints (Thanks to one of my readers for reminding me!): high-fill autobody primer.  If you spread a layer of autobody primer onto the surface of the part, sand the primer smooth using the techniques I already mentioned, and repeat that as many times as desired.


How Not to Cad (i.e. My First Cad Project)

I thought a nice next post would be to go into one of my first experiences with 3d modeling, both because it was an incredible learning experience and because it was just hillariously awful!  I 3d modeled (and subsequently 3d printed) this contact lens case with working screw tops:

pic5

it worked very well, but here’s how I 3d modeled it:

  1. Cadded a cylinder
  2. Imported a model of an M4 machine screw
  3. Cut enough threads off the machine screw to match the height of the cylinder.  Then, I copied and pasted the resulting threaded cylinder
  4. I moved the threaded cylinder into the center of the cylinder cadded in step 1
  5. Then, I did a boolean subtract so I was left with the imprint of the threads in the walls of a shelled cylinder.
  6. I then took the other copy of the altered machine screw in step 3 (since the first copy disappeared when I subtracted), and used that as part of the screw top for the lens case.
  7. I then repeated steps 1-6 again for the other cylinder to make the full lens case

Now that I think back on it, instead of forcing my chosen cad software at the time to do things it wasn’t actually capable of doing easily, I should have just bit the bullet and learned a better cad software haha.  Even though this was an absolutely horrible way to make this thing (that has made every mechanical engineer friend I told the story to cringe and die a little inside), I learned a number of things from the experience that apply to design for 3d printing in general, namely:

  1. Tolerance: make sure that if you are subtracting from a shape or shelling it, make sure you are left with walls that are 3d printable (my general rule of thumb is 3mm or more for wall thickness)
  2. orientation: be careful how you construct the male and female threads because if you orient them wrong, they will come out reverse threaded (lefty tight, righty loose) (and that totally didn’t happen to me with that contact lens case, I don’t know what you’re talking about :D)….
  3. all cad softwares aren’t appropriate for all things.  It’s the same with programming languages funny enough… you can do anything in a programming language, but there will always be programming languages that make certain tasks easier.

On this vein, the next post will talk about things that I’ve cadded and printed that turned out well!  Until next time.

John (aka The Mad Printer)

My first project with Hyrel

As soon as the Invention Studio got their first Hyrel printers (the Hyrel Engine), I decided to embark on a big project: printing, assembling, and finishing a fully working ukulele!  I didn’t design the ukulele (designed by thingiverse user solstie: http://www.thingiverse.com/thing:268090) , but the whole fun of this project was learning how to print with the Hyrel printer and learning how to properly finish a 3d print!  In order to print the ukulele, there were a few things I had to consider, namely:

  • Will there be enough strength in the plastic to deal with the immense amount of tension the strings will put on the ukulele body?
  • Can I print the ukulele in one shot, or do I have to break it up, print each piece, and assemble it?

Using a hyrel printer helped deal with the strength concern, because every part was printed with 100% infill!  Thanks to the versatility of the Hyrel, I was able to set the prints up so that every part of the ukulele that printed was solid plastic.  I did have to break it up into multiple pieces, though (below – a body section, a neck section, and the tuning pegs).

And I’m not saying I had a few failures along the way, because I definitely did haha (see below)

20150214_120427

This, however, was due to the way I oriented  part of the ukulele on the bed and not because of the printer itself!  So, as soon as I oriented this piece correctly, it printed out flawlessly!

The only regret with the printing is that I shouldn’t have used ABS for the print… It contracts enough when it shrinks that you get layer cracking:

20150204_095116

Since some of my pieces turned out with this cracking you see above, I used another tool to fill the cracks that I highly recommend for this purpose:  the 3doodler 3d printing pen!  Contrary to what the manufacturers say, you can’t draw 3d objects in the air with it, but it works great as, essentially, a plastic soldering iron.  I used the 3doodler to inject some plastic into all the cracks (that, by the way, was the same color as the ukulele body).  you can see all the rough spots below from where the plastic was injected:

To smooth out those rough spots, I repeatedly sanded and applied acetone to them, and they just blended into the surface of the ukulele!  I also melted some plastic into the space where the neck meets the body to give it some added strength.  Once all my fills were sanded and smoothed out, I then proceeded to apply XTC3d by Smooth On to the entire body of the Ukulele. In addition to filling all the 3d print layers, XTC strengthened the ukulele even more!

When I finished smoothing out and strengthening the body, I decided to put the tuning pegs that I printed into the holes on the head, string it up, and see if it worked.  It did actually work!  However, it couldn’t hold a tune for more than a few minutes, and when I turned one of the tuners that I had printed, it snapped on me.  In hindsight, I should have seen that coming since 3d printed things tend to shear along layers, and, due to how I had to print the tuners, that’s exactly what happened!  So, then I switched to some $15 metal tuners, and that made all the difference in the world.  It now held a tune reliably, and it played very well!  Here’s a picture of the finished ukulele:

pic6

It was an incredibly long (but incredibly fun!) project… it took around 40 hours to print, counting failed prints.  And it took me at least that long to finish, sand, and strengthen with XTC (if not longer).  I owe it to the Hyrel printer for giving me the flexibility to attempt this project, so I’m glad it turned out really well.

So that’s the story of the ukulele, my first big project I did as a 3d printing enthusiast!  I’ve done quite a few big projects since then, so more are on the way!

John (aka The Mad Printer)

The Longest 3d Print… That I’ve Ever Done

That’s right!  Just like the title says, this is a post about the longest 3d print I have ever done and the project that I made out of it.  I started with this part: http://www.thingiverse.com/thing:538350… it’s author has entitled it “Funnest print to watch”, and it certainly lives up to its name because it’s such a complicated shape that magically prints without any support material at all!  So, I started out printing a small one on the Up Mini that I had access to at the time (which, by the way, took about 10.5 hours for an up-mini-sized one of these things).

Then, I had a thought that popped into my head… “I want a bigger one”.  I didn’t know what I was going to do with it at the time, but I wanted a bigger one!  So, I took the design and scaled it up to the biggest size that the Makerbot z18 I also had access to could hold.  The “official” Makerbot time estimate was around 96 hours, so I thought, “ok…. 4 days!  hope this works….”… well, Makerbot was a bit off on it’s estimate (by 2.5 days).  It actually took a whopping 6.5 days to print out!  I couldn’t believe that it finished, but when it did, it was incredible.

So, like I said, I had no clue what to do with this really cool monster 3d print, so I polled some of my friends.  One friend said “you should make a lamp out of it”, and that really stuck with me!  So I rushed right out to Home Depot and decided to buy all the things I needed to make this crazy 3d print into a lamp.  My bill of materials included

  1. one lamp kit (power cord, socket, etc)
  2. one lamp shade
  3. a 1.5″ diameter hunk of PVC pipe
  4. a 1.5″ to 2″ PVC flange
  5. a 2″ diameter hunk of PVC pipe
  6. a 2″ endcap

So, with my materials in hand, I set about creating my lamp.  The first thing I realized was that since stock PVC pipe was all shiny and had writing all over it, it didn’t look very nice.  So I sanded all the writing and shine off until I was just left with nice, smooth plastic.  Then I assembled my lamp post using the pipe and flanges.  The 2″ endcap was to give the lamp socket somewhere to sit at the top of it all.  Also, I had to drill a small hole through the endcap so the cord could dangle through the middle of the lamp post.

After I assembled my lamp post, I realized I forgot to take into account one important thing… I measured the hole through the center of the 3d print at 1.5 inches, but, when you buy PVC pipe, the named diameter is an inside diameter…. There is a solid 1/8″ of pipe added to either side of that 1.5 inches!!!

Some quick thinking on my end saved the project, and I ended up sanding a taper into the bottom of the lamp post and pounding it into the 3d printed base with a mallet.  Low and behold, the taper worked!  it wedged the lamp post into the 3d printed base very nicely.

So, without any further Ado, I present my lamp with 3d printed base:

20160529_005915.jpg

I have designed other 3d printed lamps since this one, and I made sure to design the lamp with a hole that was perfectly toleranced for the PVC pipe now that I learned more:

pic13

Well, there you have it!  I’ll put another project up in a few days once I choose which one to describe next, so as always, thanks for reading and stay tuned!

John (aka The Mad Printer)

Hyrel System 30M and Engine

Now comes time to review the Hyrel System30 and the Hyrel Engine (both pictured below):

Engine (slightly older picture, but mainly the same formfactor as the one now!  I’ll post an updated picture in another post)

System30M:

Both of these printers are very cool machines!  The only difference between the engine and the system30m is some of the aesthetics (enclosure, reset button on the outside of the System vs. the back of the Engine, etc.).  They are basically the same printer, have the same build volume, and have the same level of reliability (They don’t call it Hyrel for nothing… Hyrel = High Reliability.  That was the association with the name they were looking to go for!).  Case in point, here’s a close up shot of a print that was done in ninjaflex on Hyrel printers:

ninjaflex

As a matter of fact, the Hyrel printers are so versatile, they can do any material you can think of (and I’ve been through quite a few materials – below!!)

hyrel prints

From top left to bottom right are:

  • Brass-Infused PLA
  • Coffee-Infused PLA (Protopasta)
  • Ninjaflex
  • ABS (Afinia)
  • machinable wax (still working on refining the settings for that one, but it did print!)
  • wood-infused PLA (Afinia)
  • Tglase (Taulman)
  • Carbon-fiber-infused PLA (Protopasta)
  • Nylon (Taulman)
  • heat-cured clay (3p quick-cure clay…. This one has been sanded on the outside, but you can see the original surface finish inside the vase).
  • Steel-infused PLA (Protopasta)

There are even more materials that I haven’t tried yet!!  Even better, the Hyrel printers don’t clog very frequently at all.  I think throughout the entire year I have worked with the Engine and the System30, I’ve only had the head clog a few times, even with all the different materials that have been pushed through the heads and different temperatures they have been run at.  If a clog does happen, it is fairly easy to clear by unscrewing the printer nozzle and pushing clogged material out of the head with an allen wrench.

These printers are also incredibly configurable!  by adjusting a few allen screws on the head, you can vary the tension with which the printer grabs the filament, which is super useful for softer filaments like ninjaflex or machinable wax.  Also, different materials have different temperatures and extrusion rates, so you can control all that as well via configuration in Slic3r and through a menu in the Repetrel software that drives it all.

Oh, and it can do up to 4 heads at the same time with some extra configuration and button pressing in the software!  So you can produce things like multi-colored parts or multi-material parts.  for additional materials that can’t be melted (like clays and silicone-like materials), There are a bunch of different heads you can buy that will take care of extruding the various materials.  It even has a laser-cutter and milling attachment, so it can be much more than a printer too.

Overall, my experience printing with these printers has been very positive, and it has enabled me to do quite a lot!  I will post more projects that I have done with the Hyrel printers in the future.

The only caution I have with this printer is that there is a learning curve.  Because of the level of configurability, it’s really easy to create settings that don’t work and make the printer seem like it doesn’t work.  Going back to my computers/printers analogy that I made in the Makerbot post, the Hyrel is the Linux of the 3d printer world.  It works very well if you are willing to put the time in to tune it to your preferences!  For example, I’ve been having trouble dialing settings in for good support material, but the settings are getting better, and the printer is generating better supports through refining of settings! However, I’ve talked very extensively with the guys at Hyrel, and they are completely willing to help anyone learn, even if you haven’t done too much 3d printing.

Now, to concretely outline why I have chosen Hyrel with respect to the other printers I have talked about:

  • I want to do more than just print ABS and regular PLA, so the Hyrel is more versatile than an Up Mini, Afinia, Makerbot Replicator, Makerbot Replicator 2, Makerbot z18, or Up Box.
  • It also has a bigger build volume than the Up Mini, Afinia, Makerbot Replicator 2, and Makerbot Replicator (not sure about the Up Box, and definitely not bigger than the z18).
  • The hyrel has been one of the most reliable printers for me.  After a year of usage between the Engine and the System30m, I have had very few mechanical problems (plenty of problems dialing in settings, but I got those straightened out with time!).
  • It’s just fun to tinker!  I love being able to create my own settings and do things that other printers can’t do (like printing play-dough).

So that’s what I have to say about Hyrel in a nutshell!  Now that I’ve completed reviews of all the printers I worked with, you will hear about projects that I’ve done (both with the Hyrel and with other printers) as well as different strategies for finishing 3d printed parts to make them look the best they possibly can.  I’ll probably be switching to posting every other day now, since posts about projects will probably be more lengthy, so keep checking in for new content!


John (aka The Mad Printer)

Mcor Iris

Now back to your regularly scheduled posts!  Life caught up with me for a day or so since I didn’t have a chance to post until now, but here’s the post about the Mcor Iris 3d printer (below)!

It’s a pretty interesting machine!  It prints full-color models by cutting and gluing successive sheets of 8.5×11 office paper together.  Basically, you load an obj file (with the color profile embedded) into the software, and it slices your model and prints each layer on a sheet of paper (along with a barcode that tells the machine which order the layers go in).  There is a standard inkjet 2-dimensional printer in the base that does the layer printing.  Then, the 3d part comes when you load it into the top part!  After loading all the sheets, the printer then cuts and glues them like a big automated craft project.

It produces really interesting things with full color, however that’s not the main application I have seen it used for.  The big pro for this printer is when it is applied to vacuum forming.  You can print out your form in paper with the Mcor, which makes it much more resistant to the heat that vacuum forming needs to melt the plastic around your form.  A lot of forms that are made with plastic only last a few times before they start melting and deforming from the heat.

That being said, there are a few downsides…. For starters, if you don’t use it frequently, the ink in the inkjet printer dries up, and that causes you to have to run color cleaning pages through the printer until the ink runs clean.  This process of restoring the ink is very time consuming!  I can’t speak to the level of physical maintenance however, as I have never handled maintenance on it… just printing.  Also, you do need to make sure not to waste paper… I printed out a little 2x2x2 inch figurine, and it took 300 sheets of paper!  So, if being eco-friendly and caring about paper waste is your thing, then make sure to pack a few prints into one 8.5×11 inch build space and optimize the amount of paper used.  There are even certain orientations that will use more paper than other orientations!

I also feel like the printer is fairly expensive for what it does (in the $50,000 range).  That being said, it is still a neat concept!

So, that’s all I really have to say about the Mcor.  However, I have now reached the point of comparing all these printers to Hyrel printers (The printers I will be using for the future projects I talk about in coming posts in the next few months).  Now, since all the other reviews have been completed, I’ll outline why I have chosen Hyrel with respect to the other printers.  Stay tuned and thanks for reading so far!

John (aka The Mad Printer)


Makerbot z18

The last print in Makerbot’s lineup that I have used is the Makerbot z18 printer (below)

There are quite a few things that are acceptable about this printer!  However, there are also quite a few things that aren’t.  It’s build volume is gigantic (10x10x18 inches), which is a significant plus!  A larger build volume enables you to do more things (and cooler things too!).  Also, it is fairly plug and play, with a really nice interface and Makerware making the whole process very easy.

That being said, I really realized with Makerbot that you can compare 3d printers to the different makes of computer.  Printers like the Up Mini are analogous to windows.  Somewhat closed source, but customizable and fixable.  The Makerbot printers are analogous to Apple computers.  They have beautiful aesthetics, and the interfaces are really easy to use, but if something goes wrong, you just have to send it back to Apple and hope they fix it!  That’s exactly what happens with the Makerbot z18.  While it does print well, if there’s a clog in the smart extruder, you have to send the entire smart extruder unit in for replacement.  Additionally, if your nozzle clogs outside the 90-day warranty window, you have to just buy another nozzle (About a $200 investment).  Not to mention that Makerbot as a company isn’t doing so well, since they outsourced their manufacturing.

Well, there you have it!  I have 3 more printers to review (Mcor Iris, Hyrel Engine, Hyrel System30), so keep following the blog to find out what comes next!

John (aka The Mad Printer)

Makerbot Replicator 2 and Replicator

Next up, we journey into the land of Makerbot!  The Replicator 2 is hands down their best offering (which is ironic, because it’s not the newest replicator they have…. The newest replicator suffers from some of the same problems as their z18 printer.  More to come about that later!).  I’ve done several prints on a makerbot Replicator 2 all without any problems.  The best part about the Replicator 2 is how easy it is to repair.  The head assembly can be completely disassembled for cleaning and declogging, so that’s a nice feature.  The build volume is bigger, but it can only print PLA since it doesn’t have the heated bed necessary for ABS printing.  So that’s the one detractor.  If you just want to print plastic, then it’s great!

The original Replicator is a neat machine because it is just as easy to work with as the makerbot Replicator 2 and has most of the same specs, but it has two heads instead of one, so you can do multiple colors, which is really cool!

From a fit and finish standpoint, the Replicator 2 feels like a more professional machine, since the replicator’s case is laser-cut, which gives it a hobby-ish feel.  Not necessarily a bad thing, but if looks are your thing, then… yeah.  pictures below for comparison!

Makerbot Replicator 2:

Makerbot Replicator:

That’s all for now!  More printer-y goodness from the land of Makerbot in the next post 😉

John (aka The Mad Printer)

Leapfrog Creatrxl

Since I ended up skipping the formlab, The Leapfrog Creatrxl (below) is the next printer!

Overall, I have very good things to say about the printer!  It has gigantic build volume, and the two nozzles are very nice for printing either dual-color or multi-material parts.  It uses either Simplify3d or Repetrel (the printer I have used ran Simplify3d).  This printer really shines with Simplify3d because the support generation algorithms are fantastic!  When I have done prints with support, the support has brushed right off.  It is very easy to unclog too, as Leapfrog has designed the print heads to be wide enough for a 1.5mm allen wrench to fit nicely through the head (without the nozzle attached of course!).  Basically, just heat the clogged extruder up, and shove a 1.5mm allen wrench through the hot extruder so that all the gummed up plastic comes out!

The other elements of the printer are just as easy to work on, as just about every part is very easily disassembled.  Leapfrog’s customer service is very responsive as well!  The printer I worked with had a few issues early on in its lifecycle that Leapfrog worked very hard to correct and make right!  They sent me replacement parts, and after installing them, the printer was back up and running.

The only downside with this printer is the calibration routine.  It really needs two people to calibrate, which can be kind of hard.  Because of its size, it’s really hard for one person to reach all the nuts on the ends of the calibration screws while still checking the distance between the platform and the heads with a piece of paper.  So, usually, it’s good to have one person holding onto the nuts on the end of the screws with a ratchet while the other person adjusts the spacing between the heads and the platform.

Whelp, it’s 2:30am haha.  Time flies when you’re having fun posting!  stay tuned for the next printer review

John (aka The Mad Printer)