Hey everyone, this post is a little longer than normal, but that’s because this will get turned into a guest blog post for a company called MakePrintable (more about the service they offer at the end of this post!)!!
Since I’ve been playing with Simplify3d settings for my Hyrel for the past i-don’t-know-how-many posts, I figured it would be good to switch it up and do another cad project! Much like my BMW Gear project (https://madprinter.org/2016/09/18/1991-bmw-850-project/ for those of you that are new or haven’t seen it!), this was a project to cad a replacement part that wasn’t sold anymore! This time, it was a little less complicated than the BMW gear, but still as important to the product that it goes to.
A friend of mine came to me with a problem: his camping tent uses plastic clips to anchor poles to each other so it can stay up. However, over time, some of the clips had gotten lost, and he couldn’t find replacements! Instead of buying a new tent because a few clips were missing, he gave me the actual clip and asked if I could reproduce it.
Seeing the clip, the design was simple enough (below) (just a crescent shape with a hole in the middle)!

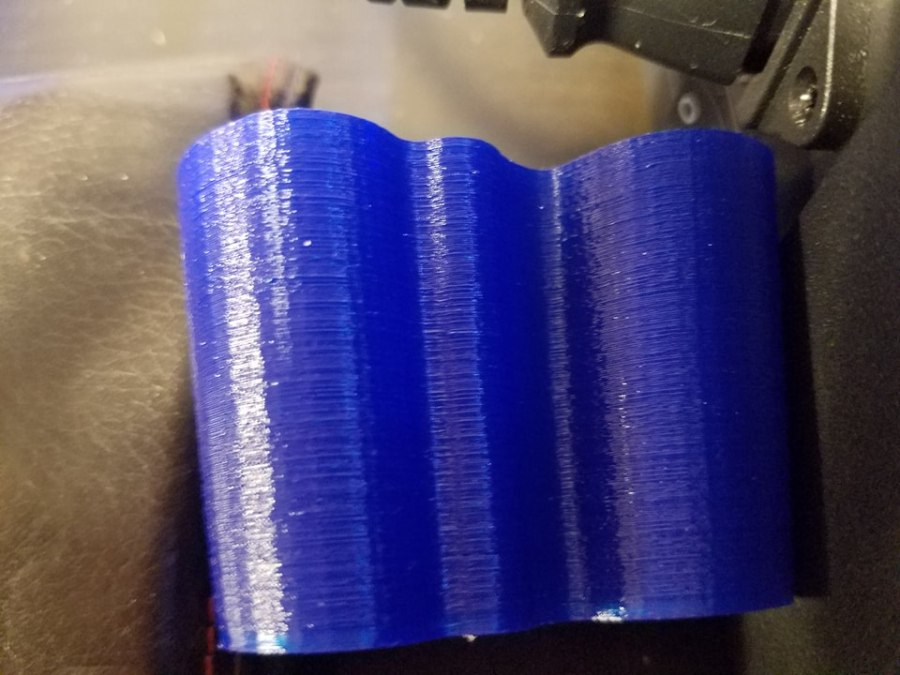
So, given that, I got to work! I took a head-on picture of the clip’s profile, like so:

I had to take this picture a few times, because I wanted to ensure that I got the sharpest profile I could. Specifically, I needed that level of detail in my photo because I was going to trace the profile in Inkscape in order to get the most accurate reproduction of the clip! Just like the BMW gear, I imported the image into Inkscape and used the bezier tool to trace the curves! When I was satisfied that I had the desired profile, I exported my tracing to a .svg file format.
Why .svg do you ask? Well, I can then take the .svg file and import it into Autodesk Fusion360 (my cad software of choice) as a sketch, thus giving me a base from which to construct the 3d version! Upon importing the sketch, I then took it and extruded the sketch to the exact height of the clip.
If you were paying attention enough, you probably have a few more questions ;), namely
- If you imported a sketch of a profile and extruded that, you wouldn’t get the hole in the clip!
- If your imported a sketch of a profile and extruded that, you wouldn’t get the lip on the top and bottom of the original part!
To both of those, I say “you are absolutely correct”.
- The hole was added in once the extrusion was complete with the correct measurements and placement
- I decided to get rid of the top and bottom of the lip to increase printing speed and print cleanup. That, way, if there wasn’t any lip (which, by the way, is a small 90 degree overhang), there wouldn’t be a need for support material, and I could make a bunch of these clips for my friend very fast!
But enough jabbering! Here’s the completed clip next to the original clip:
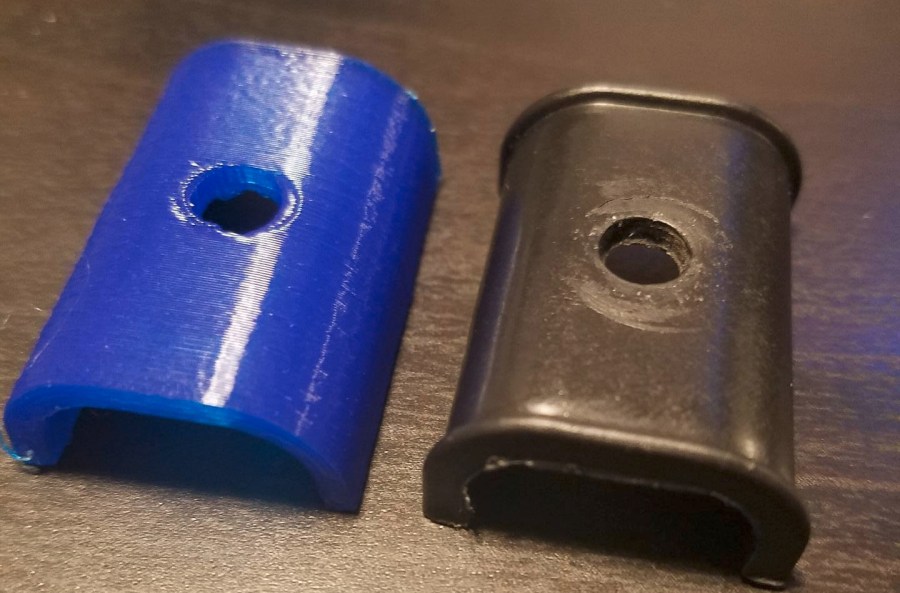
I do have to say, it ended up looking pretty good! Of course, I printed the clip using Simplify3d on my Hyrel. Honestly, I think it turned out fairly well, as the PLA is actually stronger than whatever type of plastic the original clip was made from (I can flex the original plastic with my hand, but not the PLA).
Now, thankfully, my clip wasn’t very difficult to cad, so there isn’t much to go wrong. However, sometimes when cadding really complicated things, the final product needs some repair or slicing and dicing. From my previous posts, you have seen that I tend to use a combination of Netfabb and Meshmixer for this (Netfabb for repairing and cutting already genereated STLs and Meshmixer for repairing, simplifying, and smoothing the 3d meshes that make up stl files).
However, as I mentioned at the beginning of this post, MakePrintable has a pretty interesting service they offer: a cloud-based STL repair and mesh editor in one package! I haven’t done too much playing around with it, but from my initial look on their website, it seems like a very interesting product! In addition to repairing stl files, it can take your stl and fix more complicated things like non-manifold edges. It can even reduce the number of triangles in your model in order to optimize file size vs. printability.
One big benefit (from looking at their screenshots) seems to be that their interface is a little more intuitive than that of Meshmixer. With Meshmixer, you have to know some targeted pieces of information. For example, reducing the number of polygons in Meshmixer is done via a process called “Quadric edge decimation”. MakePrintable just seems to have sliders to allow you to adjust that, making it slightly easier! Give it a try (if you are so inclined) and comment with your thoughts. I’d love to know!
Until next time,
John (aka The Mad Printer)